Advanced
Specific topics with details
LED Layout
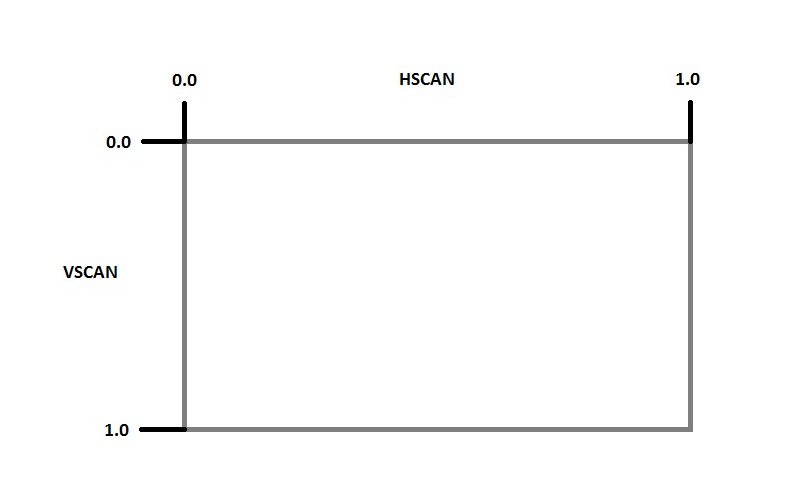
Hyperion assigns each single LED a specific position at the picture. These positions are squares and to create a square you need 4 values (top edge, bottom edge, left edge, right edge). These edges are reflected in hmin, hmax for horizontal and vmin, vmax for vertical. They have a value range from 0.0 to 1.0.
So let's have a closer look. Following a single led definition:
{
  "hmax": 0.2,
  "hmin": 0,
  "vmax": 0.2,
  "vmin": 0
}
Let's visualize the example above!

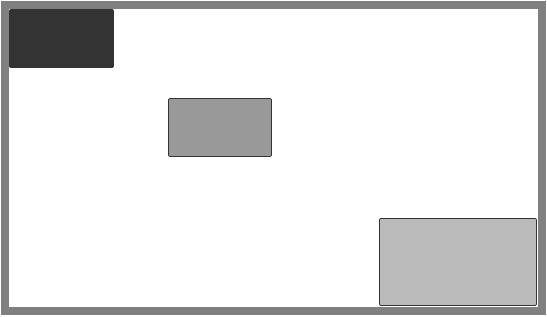
So let us add 2 more LEDs to make it more clear
The order is important! The first entry is the first LED, the second the second LED, ...
{
  "hmax": 0.2,
  "hmin": 0,
  "vmax": 0.2,
  "vmin": 0
},
{
  "hmax": 0.5,
  "hmin": 0.3,
  "vmax": 0.5,
  "vmin": 0.3
},
{
  "hmax": 1.0,
  "hmin": 0.7,
  "vmax": 1,
  "vmin": 0.7
}
Additional properties
You may connected different LED stripes with different RGB byte orders. You can overwrite the global RGB byte order by adding a colorOrder property to all LEDs that require a different one.
{
  "hmax": 0.2,
  "hmin": 0,
  "vmax": 0.2,
  "vmin": 0,
  "colorOrder":"gbr"
},
{
  "hmax": 0.5,
  "hmin": 0.3,
  "vmax": 0.5,
  "vmin": 0.3
},
{
  "hmax": 1.0,
  "hmin": 0.7,
  "vmax": 1,
  "vmin": 0.7
}
In this example the first LED will be gbr, the other LEDs will be assigned to the global RGB order that has been defined at the led hardware section.
Edit with Web Configuration
While editing these values in a local text editor is a little bit weird, you could edit them at the web configuration!
- Make sure you raised the Hyperion Settings level to Advanced.
- Navigate to Configuration -> LED Hardware and switch to the LED Layout tab. You will notice a new section Generated/Current LED Configuration.
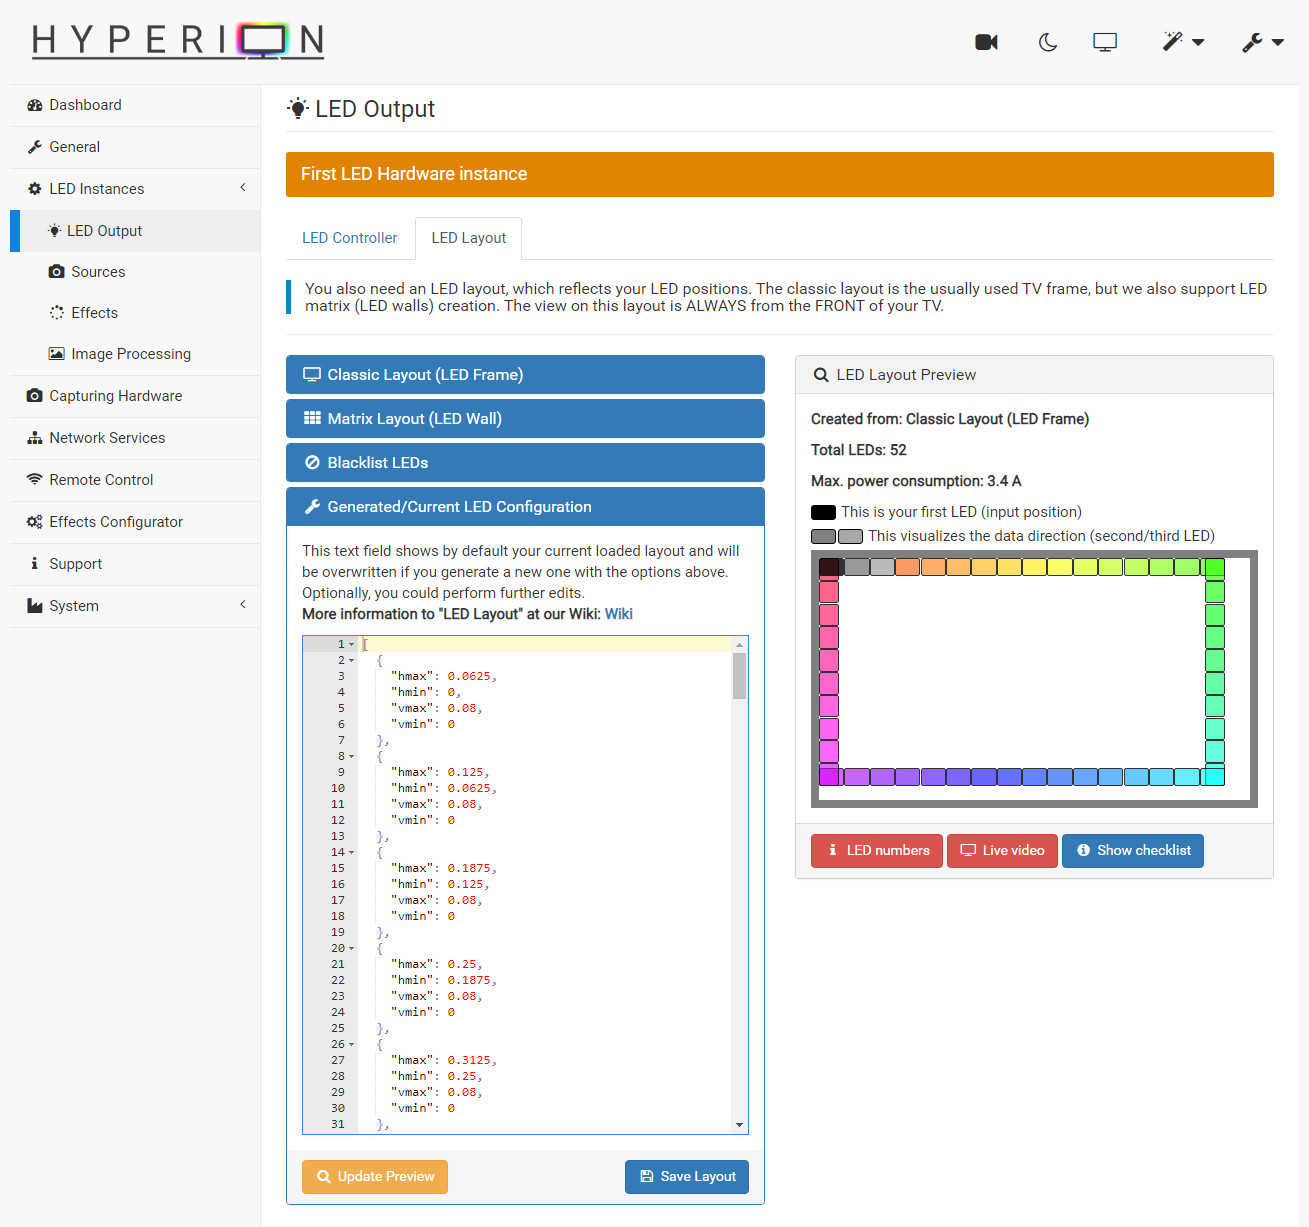
You could freely edit the values, show a preview on the right side by clicking Update Preview. When you are happy with the changes don't forget to save.
Blackbar detection
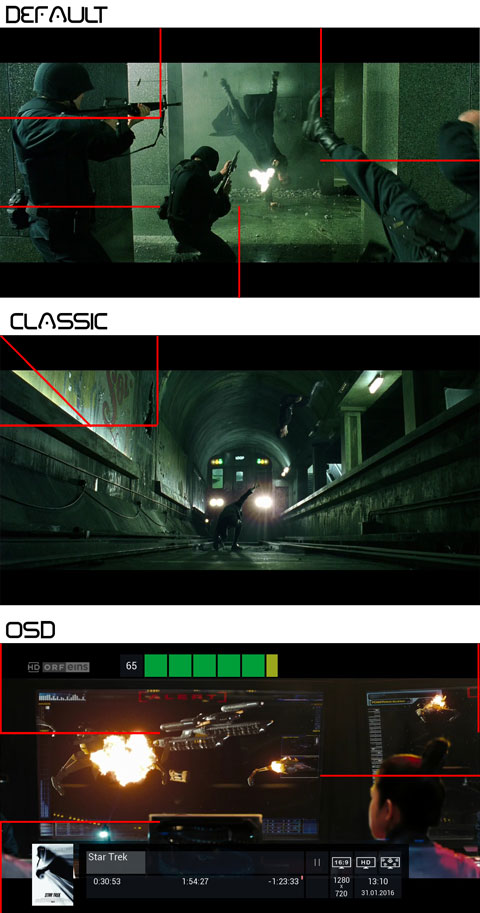
Explain the differences between the available modes for blackbar detection.
- Default: 3 scan-lines in each direction (X Y) - fastest detection
- Classic: The original implementation - lower CPU time (legacy for RPi 1) just scan the top one third of the picture which leads to a slow detection and trouble with TV channel logo.
- OSD: Based on the default mode - not that effective but prevents border switching which may caused of OSD overlays (program infos and volume bar).
- Letterbox: Based on the default mode - only considers blackbars at the top and bottom of the picture, ignoring the sides.
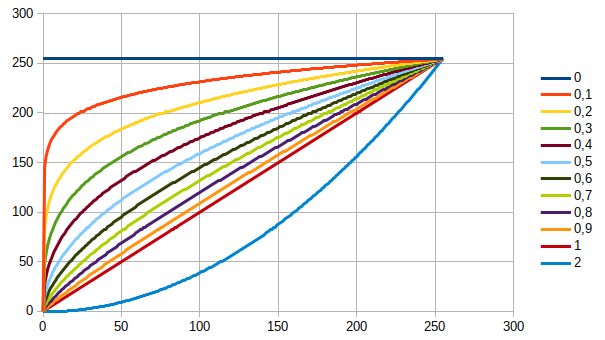
Gamma Curve
Gamma values in a graphic. AS you see 1.0 is neutral. Lower than 1.0 increase the colour, higher reduce colour.
Event Services
With Hperion's event services capabilities you can link Operating system, time-based and/or CEC events to actions executed.
Operating System Events
Settings related to different Operating System events Hyperion can handle.
- Listen to suspend events: Enable/Disable listing to operating system suspend/resume events
- Listen to lock events: Enable/Disable listing to screen lock/unlock events
- Suspend when locked: Suspend when the screen is locked, otherwise go into idle mode
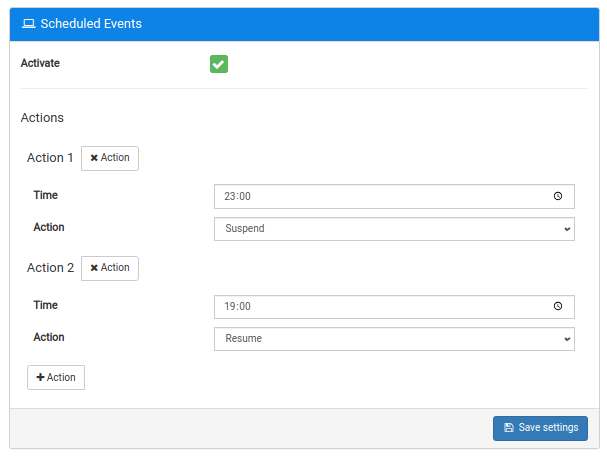
Scheduled Events
Settings related to scheduled, i.e. time based events, which Hyperion will handle.
You can define multiple event/action sets to configure which action should take place on a point in time. The action will be scheduled daily.
- Time: Point in time that will trigger an action
- Action: Action to be applied
Sample Configuration
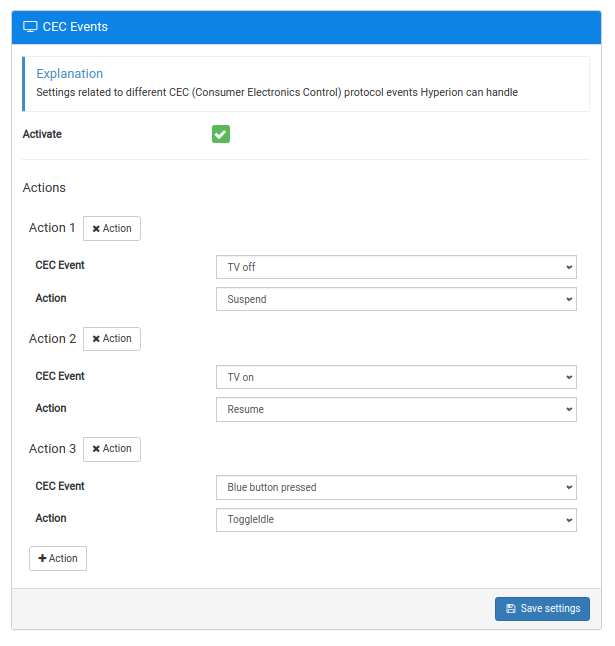
CEC Events
Settings related to different CEC (Consumer Electronics Control) protocol events Hyperion can handle-
You can define multiple event/action sets to configure which action should take place on a recognised CEC event
- Action: Action to be applied
- CEC Event: CEC event that will trigger an action
Sample Configuration